Cooling Tower Fill Replacement Installation Guide
Cooling Tower Fill Replacement Installation Guide
Cooling tower fill is an important component for heat transfer between water and air. Over time, fill can become clogged, scaled, cracked or deformed. When cleaning is no longer effective, replacing the fill can help restore cooling tower performance.
This guide explains the basic steps for replacing cooling tower fill and selecting the right replacement product.
1. Inspect the Existing Fill
Before replacement, inspect the existing fill for scaling, dirt, algae, cracks, deformation and blocked passages. If the fill is seriously damaged or cleaning cannot restore its performance, replacement should be considered.
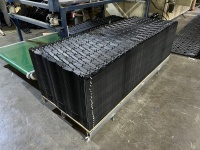
Our Cooling Tower Replacement Fill can be manufactured according to existing fill dimensions, drawings or samples.
2. Measure the Existing Fill
Accurate measurements are important when ordering replacement fill. Measure the length, width and height of the fill packs. If possible, also provide sheet thickness and flute height.
Clear photos, drawings or samples can also help confirm the correct fill structure.
3. Confirm the Cooling Tower Type
Before installation, confirm whether the tower is a Cross Flow or Counter Flow cooling tower. Different tower designs require different fill structures and installation arrangements.
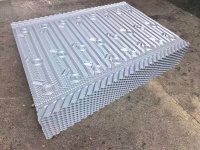
For Counter Flow applications, Counter Flow Cooling Tower Fill is designed to provide effective water-air contact while maintaining proper airflow through the fill.
4. Remove the Old Fill
Shut down and isolate the cooling tower before starting the replacement. Drain the water and remove dirt, sludge and loose deposits around the fill area.
Remove the old fill carefully and inspect the supporting structure. Damaged support beams should be repaired or replaced before installing the new fill.
5. Clean the Fill Support Area
Clean the support structure, water distribution area and surrounding components before installing the new fill. Remove scale, debris and biological deposits that could affect water distribution or airflow.
It is also a good time to inspect spray nozzles, pipes and drift eliminators.
6. Install the New Fill
Place the new fill packs securely on the support structure. Make sure the packs are properly aligned and that unnecessary gaps are avoided.
The fill should remain stable during operation without blocking the designed airflow or water distribution path.
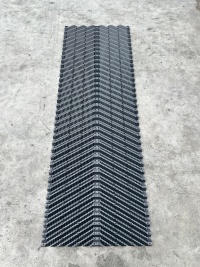
For suitable applications, Corrugated Film Fill provides a large contact area between water and air for efficient heat transfer.
7. Check Water Distribution and Airflow
After installation, check the spray nozzles and water distribution system. Water should spread evenly across the fill surface without excessive dry areas or concentrated water flow.
Also make sure the airflow passages remain open. Proper water distribution and airflow are essential for achieving good cooling performance.
8. Test the Cooling Tower
Restart the cooling tower after installation and monitor water flow, spray distribution, airflow and outlet water temperature.
Check for unusual fill movement, water channeling or other installation problems. If the tower reaches the required operating conditions, the replacement can be considered successful.
When Should Cooling Tower Fill Be Replaced?
Fill does not have a fixed replacement interval. Its service life depends on water quality, operating temperature, chemical exposure, biological growth and maintenance.
Replacement should be considered when the fill is heavily scaled, permanently blocked, cracked, brittle, collapsed or no longer provides the required cooling performance.
Need Cooling Tower Fill Replacement?
If you are planning a cooling tower fill replacement project, send us your fill dimensions, photos, drawings or required quantity.
Our team can help confirm the suitable fill type and provide a factory-direct quotation.